Making An External Hard Drive Into An Internal Drive
There’s more to it than just removing the enclosure and plugging it inside your PC
There are two types of external hard drives: “portable” and “desktop.” Portable drives are around 3 by 4 inches, and only have a single short USB cable to connect to your computer. Desktop drives are larger, about 4.5″ by 7″ and thick, and they need to be plugged into an outlet so they have an additional wire.
As most people know, external hard drives are just internal drives but with an enclosure around them. You can take apart the enclosure on a desktop hard drive and plug the bare drive inside a PC. But there’s more to it than that. Portable drives can’t do the same thing, because the bare drive doesn’t have internal connectors; its USB interface is its only connector.
If you’re planning on taking apart an external desktop drive to use it internally, there’s a couple things to know because it might not work.
I have a Seagate Expansion 4TB drive which I kept all my media on. When I took apart the enclosure and plugged it into my PC’s SATA ports to use it internally, the drive and its files did not show up properly. In my list of drives, it came up as unformatted.

And when I look at the drive through Disk Management, it shows up as a weird format with multiple partitions.
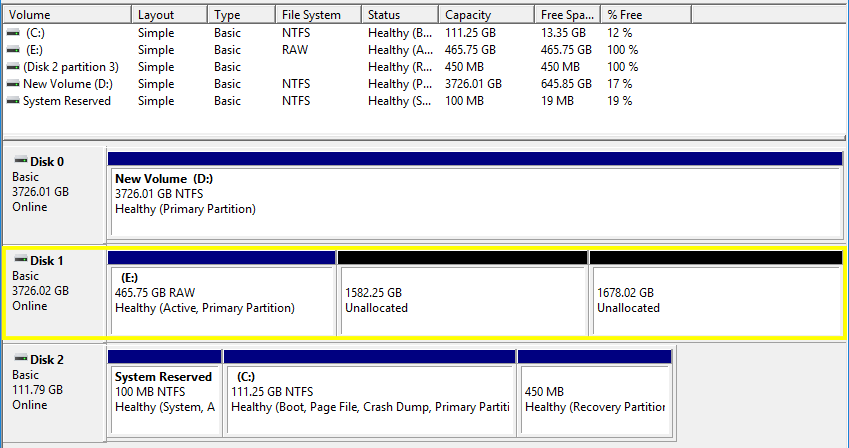
As it turns out, the enclosure actually converts the drive into a special format—a format that can’t be read through the bare drive. In order to start using it as an internal drive, I had to do the following:
- Copy and backup all the files you need off of the drive, because the drive has to be formatted and erased. I had to purchase another 4TB internal drive, just so I could copy all my files off of the external drive first.
- Remove the drive from its enclosure, and connect the bare drive to the power and data SATA ports inside your PC.
- Once booted up into Windows, go to This PC (formerly known as My Computer), and take note of the drive letter of this new unformatted drive.
- Open Disk Management by hitting Start, then start typing the word “partition”. The start menu will show an action called “Create and format hard disk partitions.” Hit enter, or click on that action.
- Locate your new drive by looking for its drive letter among the list of drives shown here.
- Right-click on the blue section of that drive, and Select “Delete partition.”
- Right-click on the grey left square section of that drive (where it says “Disk 1” in my image) and select “convert to GPT disk.”
- Now, right-click on the “unallocated” part of the drive, and select “New Simple Volume.” If you keep “Quick format” selected, then the formatting should take only a few seconds.
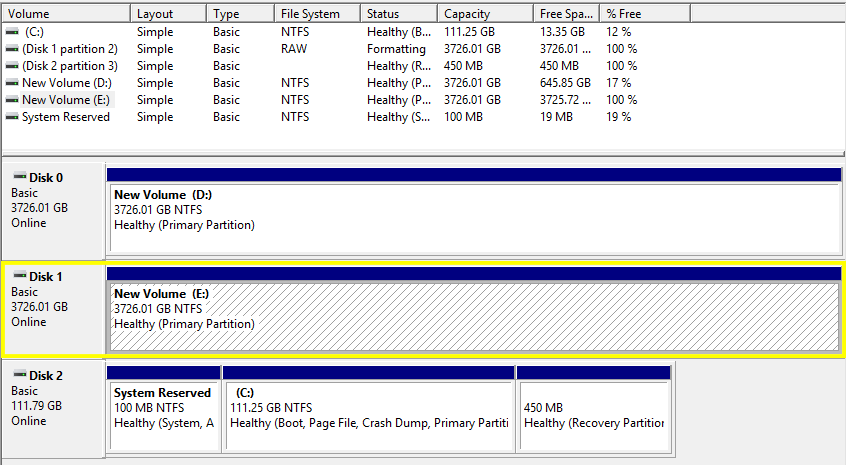
And that’s it, it should now be a regular internal drive.
One thing to keep in mind is that, supposedly, external hard drives are lower-quality drives, so it’s best to only use them for backup and media storage purposes. Using it as a constant read-and-write drive is not recommended.
Please let me know if this post helped you!
Leave a Reply
Want to join the discussion?Feel free to contribute!